Step: 1

Step: 2

Step: 3

Step: 4

Step : 5-

PDEO (CCTNS operator) அவசியம் தெரிந்து இருக்க வேண்டியவை
Public Portal
eservices.tnpolice.gov.in
Portal (Broadband & VPN)
eservices.tnpolice.gov.in/CCTNSNICSDC/Login
eservices.tnpolice.gov.in:8443/CCTNSNICSDC/Login
FRS (Broadband)
https://frs.tnpolice.gov.in
FRS (VPN)
https://10.236.248.121/login
TNCCTNS MAIL (VPN)
https://10.236.242.52
TNCCTNS MAIL (Broadband )
https://mail.tncctns.gov.in
Help Desk (VPN )
http://cctnshelpdesk.gov.in:8080
ICJS URL (VPN )
https://10.247.116.198/ICJS/login
Cri-MAC (VPN )
10.246.75.34/crimac/login
vahansamanvay URL ((Broadband )
http://164.100.44.112/vahansamanvay/Login.aspx
eprosecution ((Broadband)
https://eprosecution.gov.in/eprosecution/login
TNSTA URL (Broadband )
https://tnsta.gov.in/transport/login.do
Vehicle Policy Verification URL ((Broadband)
https://www.gicouncil.in/PolicyVerify.aspx
CCTNS SYSTEM Firefox Web Browser ல் சில URL Open ஆகவில்லை பின்வரும் Settings னை Check செய்து கொள்ளவும்
1) Your Connection is not secure என்று வந்தால்
Advanced ->
Add Exception ->
Confirm Security exception கொடுக்க வேண்டும்


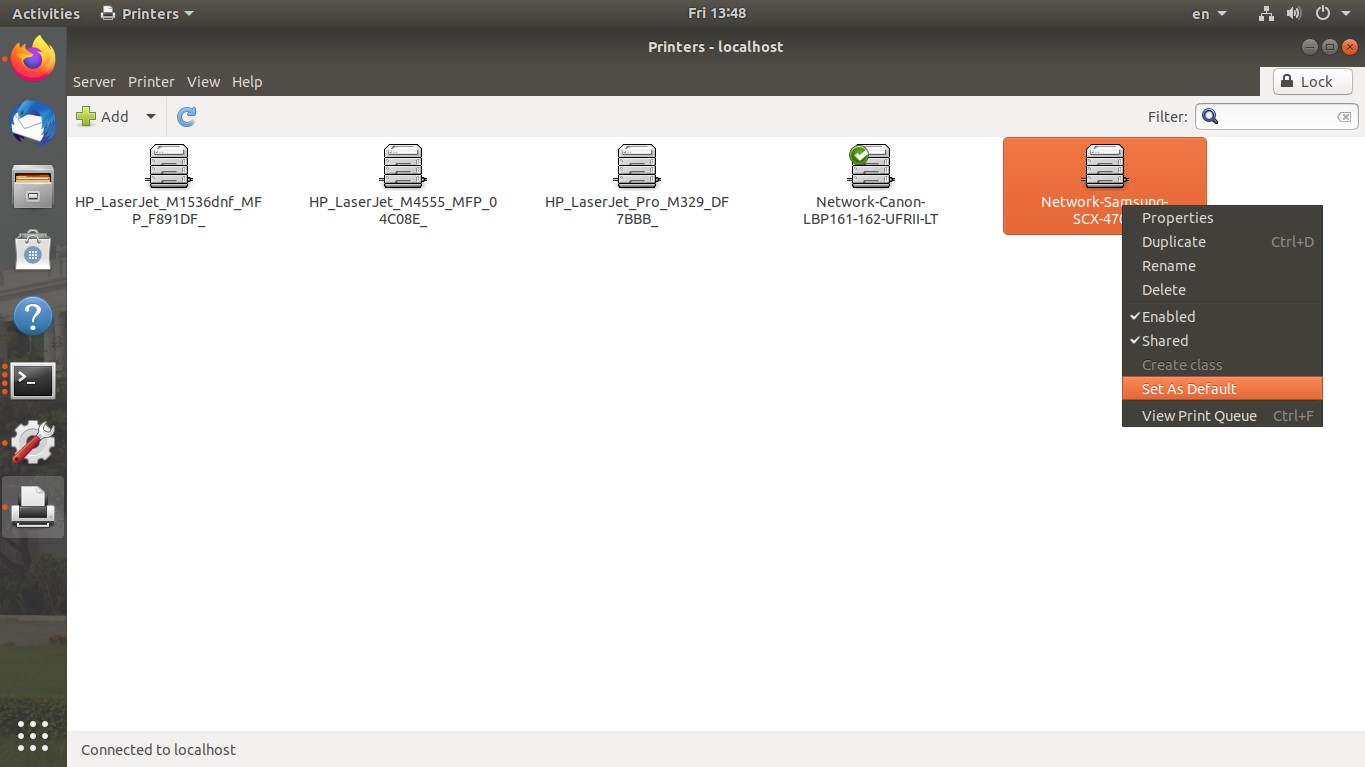
Step: 1 Go to K Menu > Samsung Unified Driver Configuration

Step: 2 Click the Add Printer
Step: 3 Click the Next Button
Step: 4Click The Search Button

Step : 1 :- ciprus dmu icon யை click செய்து
User Name : DMUADMIN
Password : dmuadmin@123,or admin@123 or admin123


Note
1) DMU Tool install செய்வதற்கு முன்பு Backup எடுத்து External Harddisk அல்லது pendrive ல் copy செய்து வைத்து கொள்ளவும்.
2) Server ல் DMU Install செய்வதற்கு முன்பு Server & client ல் CIPRUS Application னை Close செய்துள்ளதை உறுதி செய்து கொள்ளவும்.
Click & Download 4.2a dmu install command
Step:1 : -Install ciprusdmu42a
sudo –s
ciprus123
cd /opt
wget http://10.236.247.74/ciprusdmu42a.tgz --- > (இவ்விடத்தில் 100% வரும் வரை wait செய்யவும்)
mv ciprusdmu ciprusdmuold
tar xvzf ciprusdmu42a.tgz
--------------------------------------------------------------
Step:2 : -Install sym42aa
:sudo –s
cd /home/ciprus/Desktop
wget http://10.236.247.74/sym42aa_ex --- > (இவ்விடத்தில் 100% வரும் வரை wait செய்யவும்)
chmod 777 sym42aa_ex
./sym42aa_ex
----------------------------------------------------------------------------
Step:3 : -ciprusdmu icon யை desktop ல் icon அமைப்பது
Click & Download ciprusdmu.desktop உங்களது cctns mail க்கு அனுப்பபட்டுள்ள இந்த icon னை Download செய்து Desktop ல் paste செய்து கொள்ளவும்.
பிறகு ஒருமுறை ciprusdmu icon யை click செய்யும் போது படத்தில் காட்டியவாறு continue button யை click செய்யவும்.


மேற்கண்ட 3 Step களும் ஒருமுறை மட்டுமே செய்ய கூடியது. 3 Step களும் முடிந்த பிறகு SCRB க்கு Detachment வழியாக inform செய்து flag enable செய்து பிறகு Data Transfer செய்ய வேண்டும்.
-------------------------------------------------------------------------------------------------
DMU Data Transfer பற்றி தெரிந்து கொள்வதற்கு Click this link
1)
ONLINE ல் Download செய்து install செய்யும் முறை
$ sudo -s
: ciprus123
# cd /opt
# wget http://10.236. 247.74/ciprus42a.tgz
(download will be started, and wait till 100% completed)
# mv ciprus ciprus42
# tar xvzf ciprus42a.tgz
2)
Network problem உள்ள அல்லது client system ல் install செய்திட முறை
Copy ciprus42a.tgz (ஏற்கனவே
Version install செய்த
system ல்
/root/opt ல்
இருக்கும்) and
paste your sytem
$ sudo -s
: ciprus123
# cd /home/ciprus/Desktop
# mv ciprus42a.tgz /opt/
# cd /opt/
# mv ciprus ciprus42
# tar -xvzf ciprus42a.tgz
Client ல்
IP Set செய்வது
Open root/opt/ciprus Folder
Open ciprus config. Properties
Change cipa IP address to 192.168.1.2 save and close

அனைத்து client system ல் கண்டிப்பா ip யை மாற்ற வேண்டும்.